Connect Claude to your mailbox, step by step
Five minutes in Claude.ai: add MailMCP as a custom connector, authorise access to your mailbox, then ask Claude to read your emails. Every screen is shown below.
Screenshots taken on October 17, 2026 with a demo account.
Short answer: in Claude.ai, open Customize in the left sidebar, then the Connectors tab, click "+ Add" then "Add custom connector". Name it MailMCP, paste your MailMCP server URL, click Continue then Add, then Connect and authorise access on the MailMCP page. The free Claude plan allows one custom connector, which is enough for MailMCP.
What you need
- A MailMCP account with a mailbox connected — the free plan is enough to test.
- A Claude.ai account. On the free Claude plan you can add one custom connector; paid plans allow several.
Step by step
-
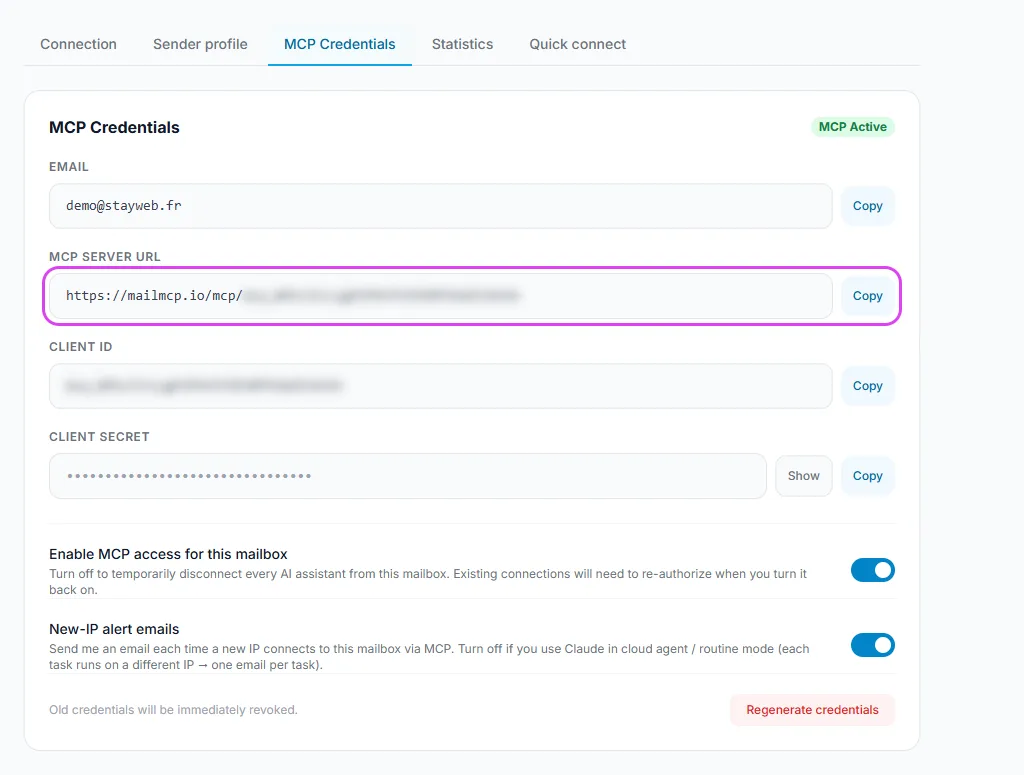
Copy your MailMCP server URL
In your MailMCP dashboard, open Email accounts, click Details on your mailbox, then the "MCP Credentials" tab. Copy the "MCP server URL": it is unique to that mailbox.
Tap the screenshot to enlarge it. -
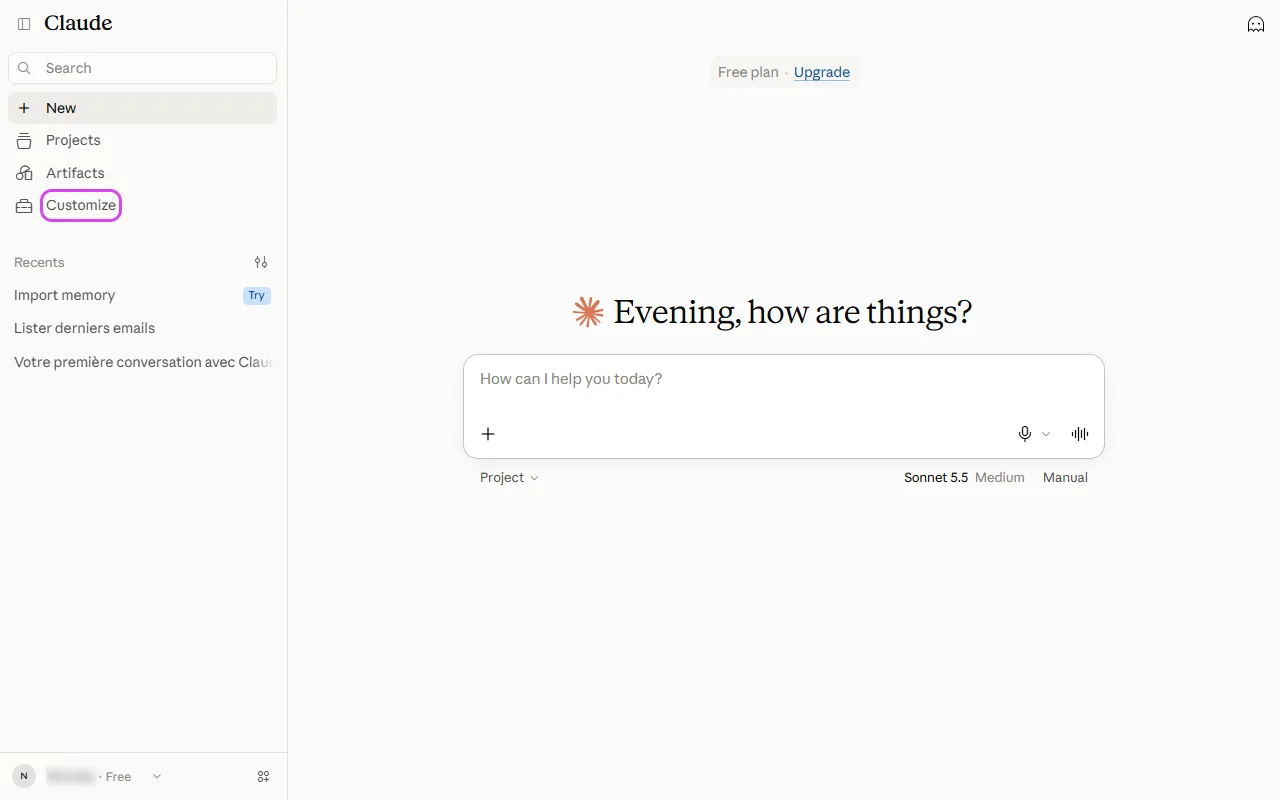
Open Customize in Claude
In Claude.ai, click Customize in the left sidebar. Connectors are no longer under Settings: they moved to this page.
Tap the screenshot to enlarge it. -
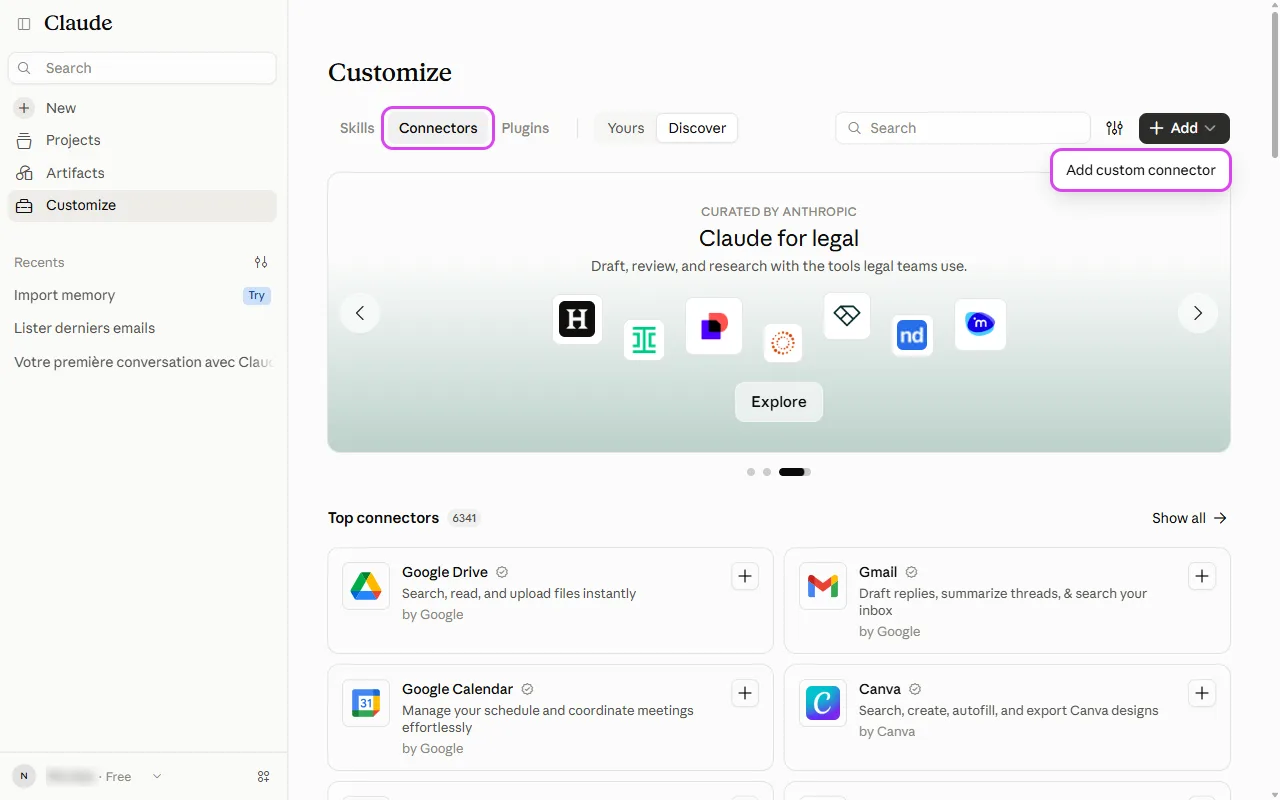
Connectors → "+ Add" → "Add custom connector"
Open the Connectors tab, click the "+ Add" button at the top right, then "Add custom connector".
Greyed-out option? The free Claude plan allows a single custom connector. Remove the one you no longer use, or upgrade your Claude plan.
Tap the screenshot to enlarge it. -
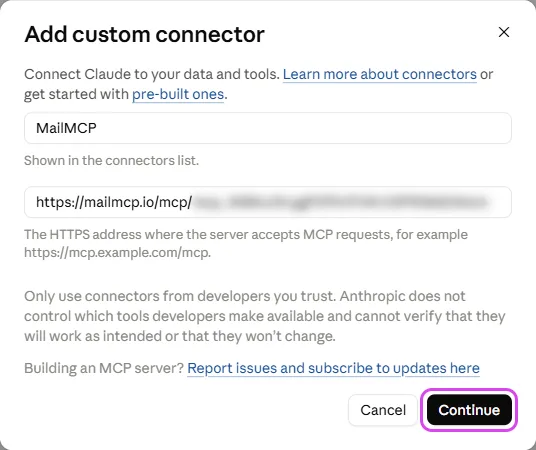
Name it and paste your URL
Type "MailMCP" as the name, paste your server URL in the second field, then click Continue.
Tap the screenshot to enlarge it. -
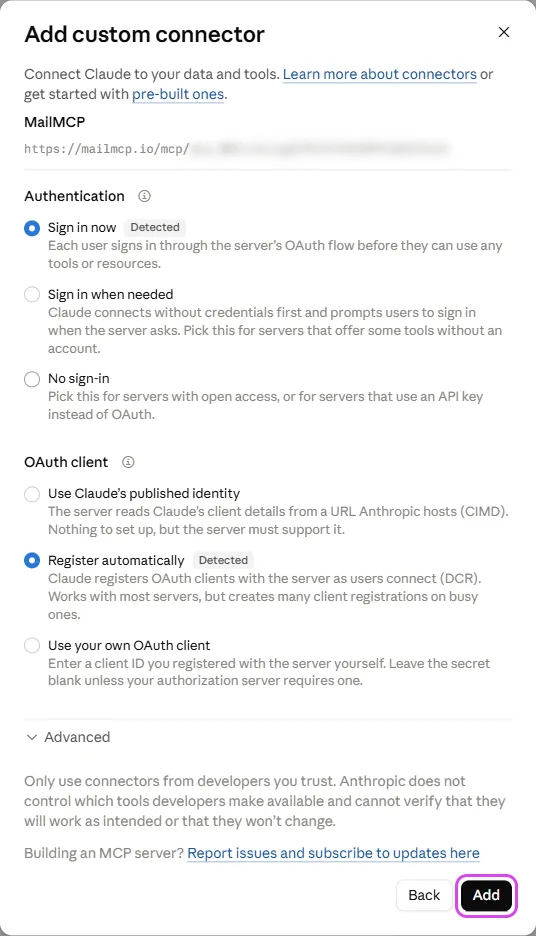
Keep the detected options, click Add
Claude detects on its own that MailMCP uses OAuth and registers automatically: both options carry a "Detected" badge. Change nothing and click Add.
Tap the screenshot to enlarge it. -
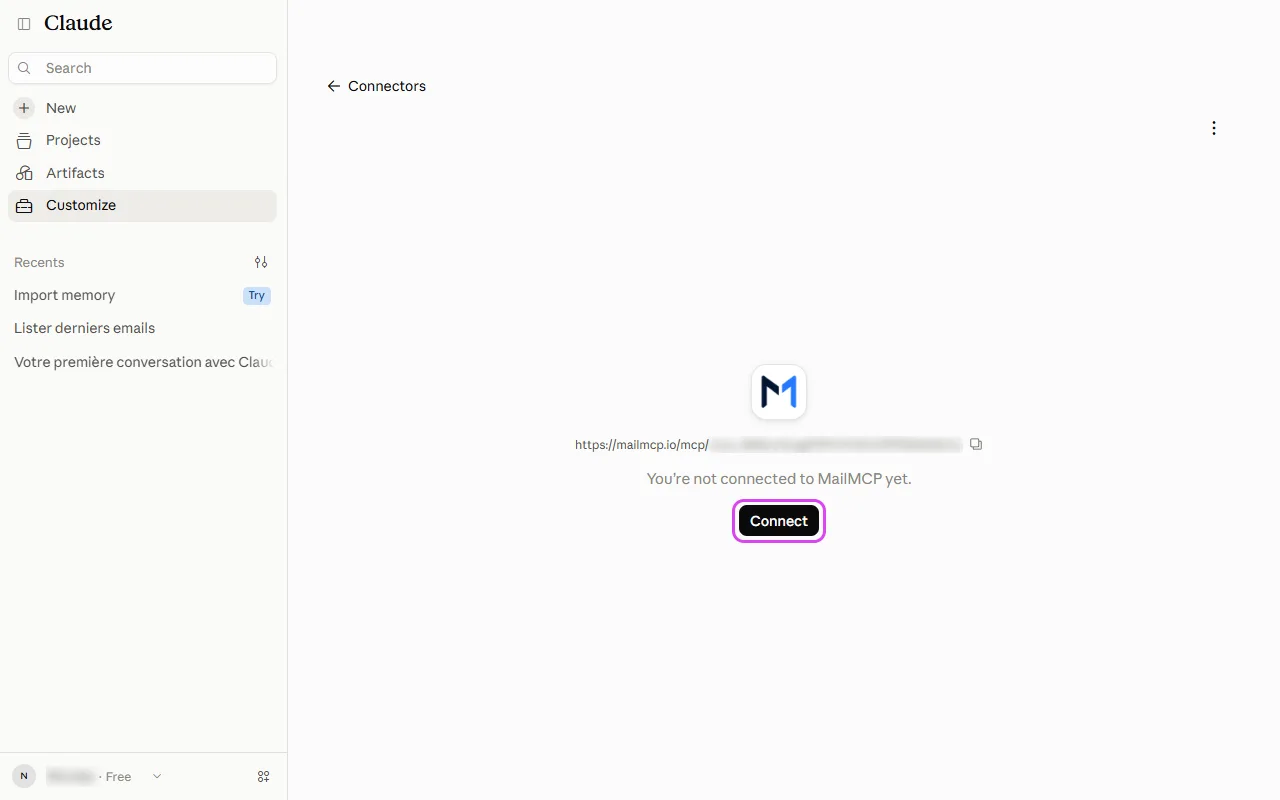
Click Connect
The connector now appears with "You are not connected to MailMCP yet". Click Connect: Claude sends you to MailMCP.
Tap the screenshot to enlarge it. -
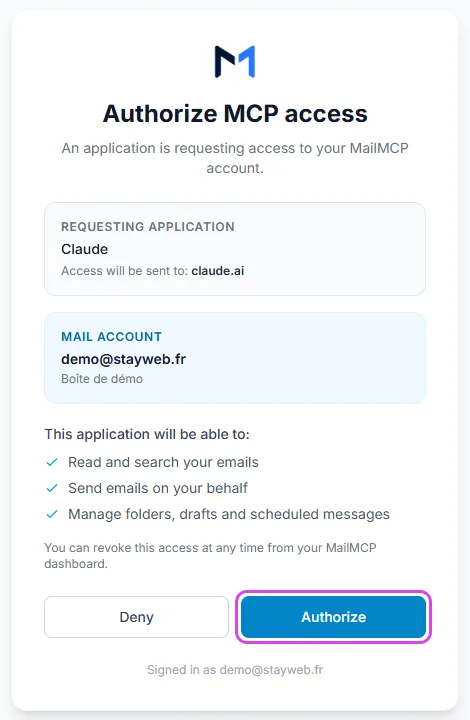
Authorise access on MailMCP
On the MailMCP page, check the mailbox shown, then click Authorize. If you are not signed in to MailMCP yet, sign in first. You can revoke this access at any time from your dashboard.
Tap the screenshot to enlarge it. -
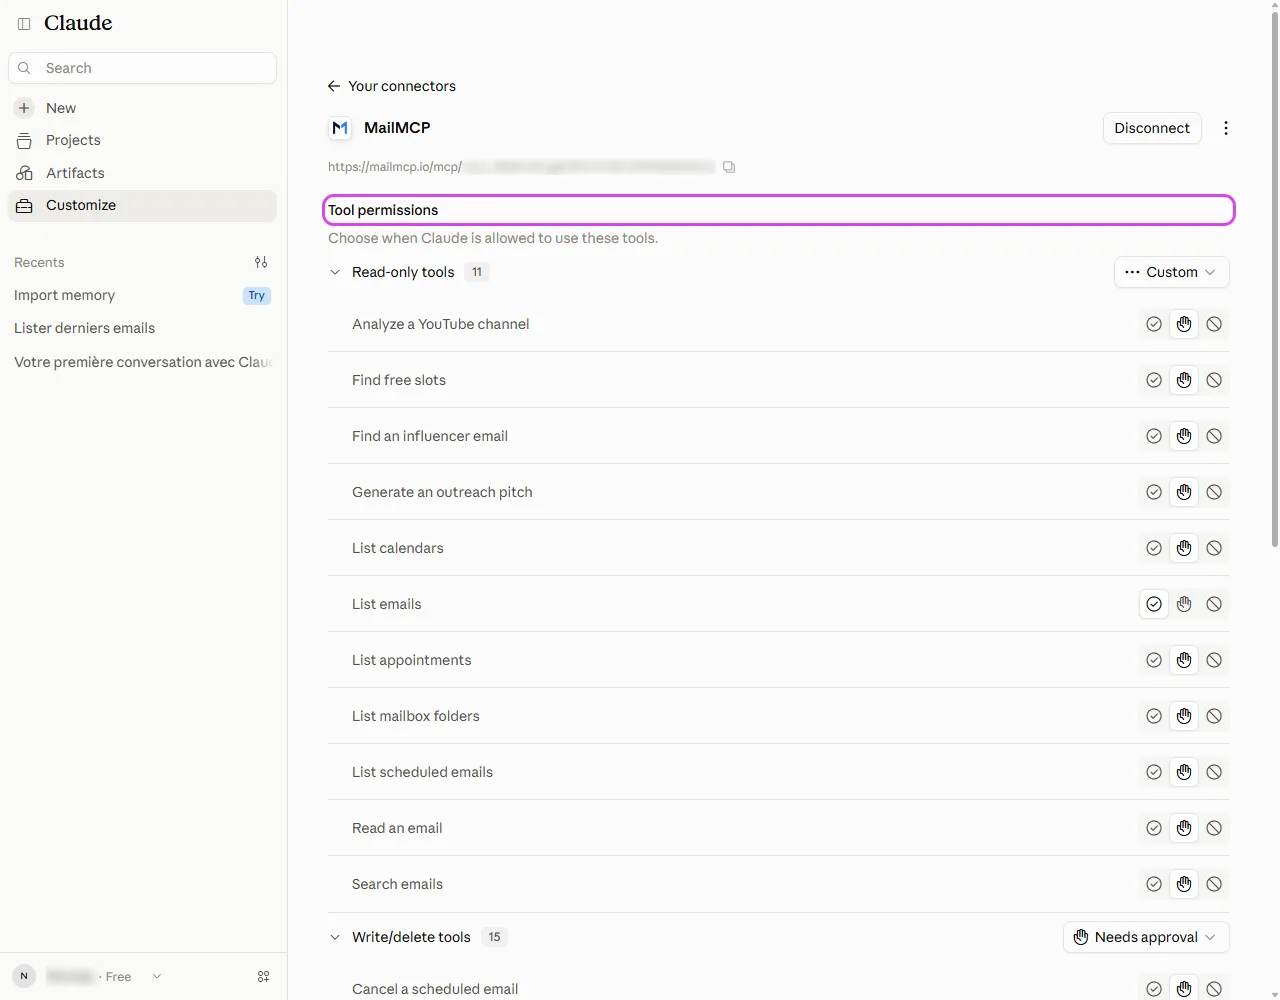
MailMCP is connected
Back in Claude, the connector shows its tools. By default Claude asks for approval before each use ("Needs approval"); you can change it per tool here or answer "Always allow" the first time.
Tap the screenshot to enlarge it. -
Ask your first question
In a new chat, name the connector in your request:
Use MailMCP to list my 3 most recent emails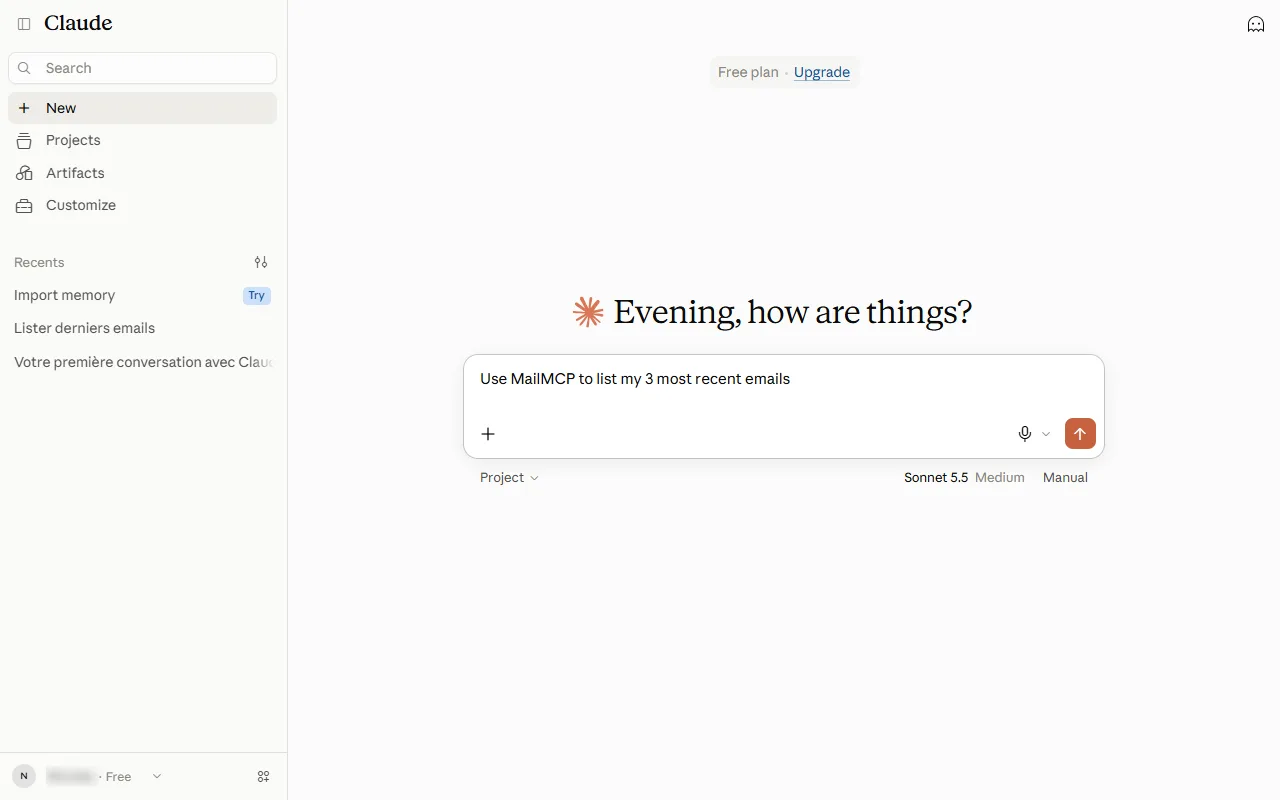
Tap the screenshot to enlarge it. -
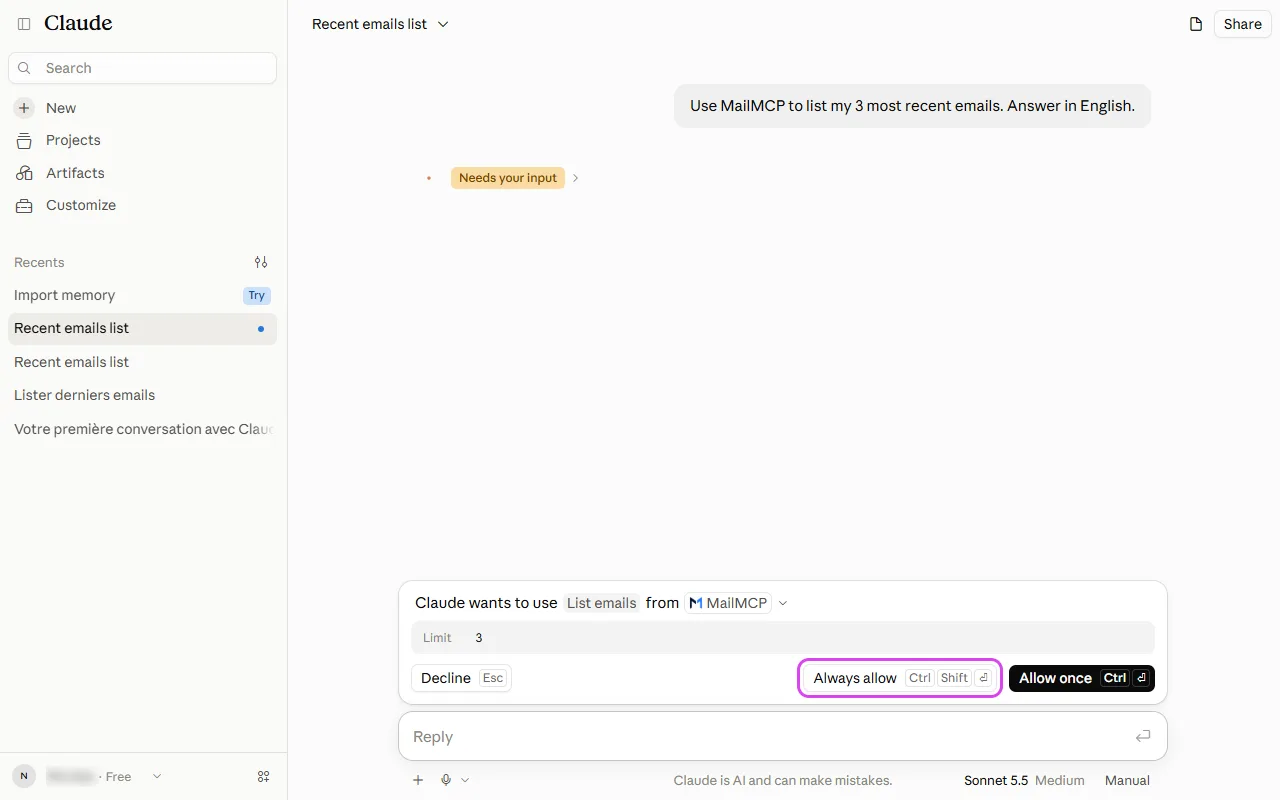
Approve the tool the first time
Claude asks permission to use "List emails". Click "Always allow" so it does not ask again for this tool, or "Allow once".
Tap the screenshot to enlarge it. -
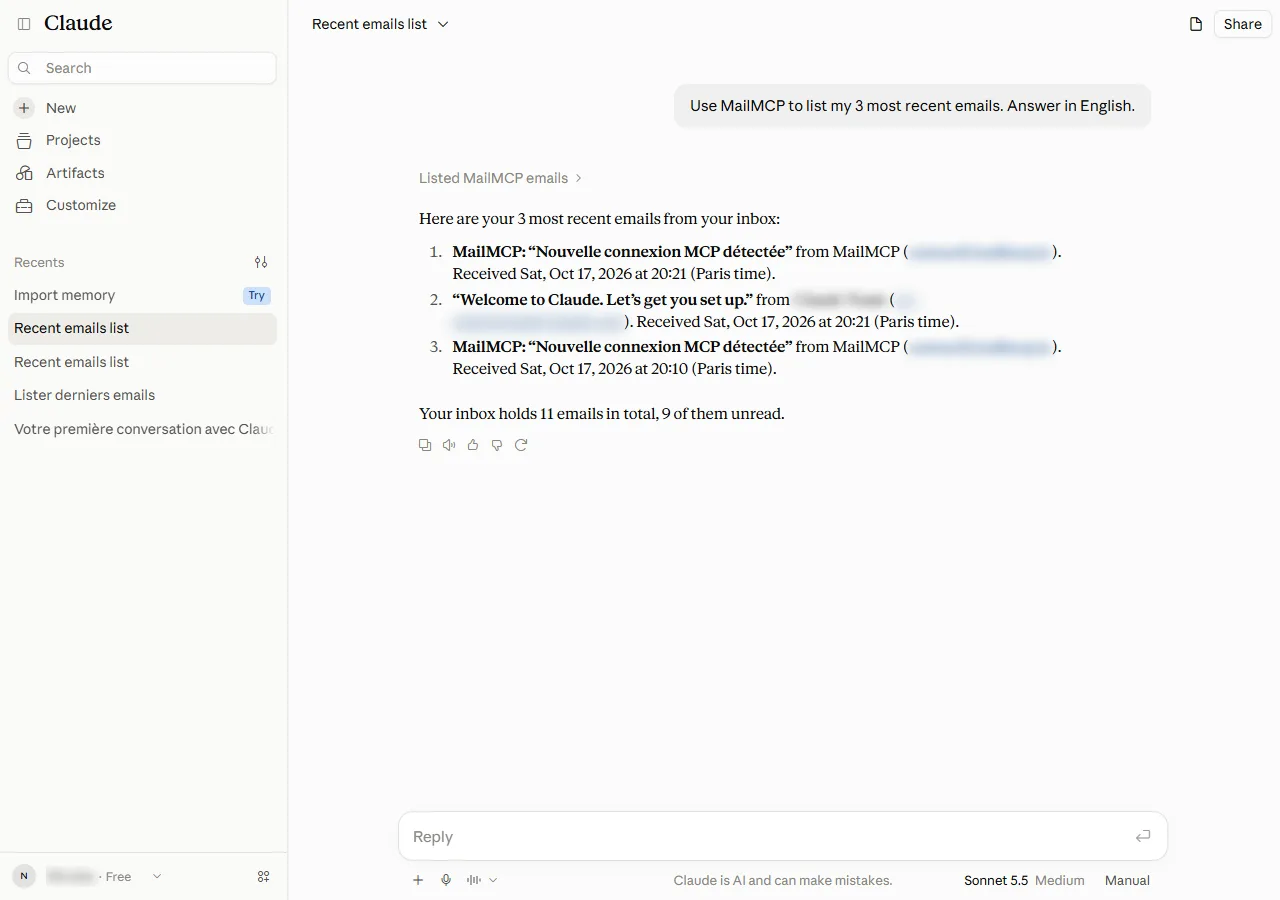
Your emails appear in Claude
Claude lists your latest emails and offers to open or answer one. Senders are blurred on this screenshot.
Tap the screenshot to enlarge it.
If it does not work
"Add custom connector" is greyed out
The free Claude plan allows a single custom connector and one is already added. Remove it from the Connectors tab (⋮ menu, Remove) or upgrade your Claude plan.
Claude says it does not have access to my emails
Check that the MailMCP connector shows Disconnect (and not Connect) in Customize → Connectors, then name MailMCP explicitly in your request.
"Tool execution failed" after a few requests
The free MailMCP plan allows 5 calls per day per mailbox. Once used up, calls are refused until the counter resets at midnight UTC. The Pro plan raises it to 500 per day.
Authorisation fails or loops back to MailMCP
Make sure you are signed in to MailMCP with the account that owns the mailbox, and that the "MCP Active" badge is on in the MCP Credentials tab. Then click Connect again in Claude.
Other illustrated guides
Still stuck? A real person answers.
Tell us what you see on screen and we will look at your case — support is handled by the people who build MailMCP.
Contact support